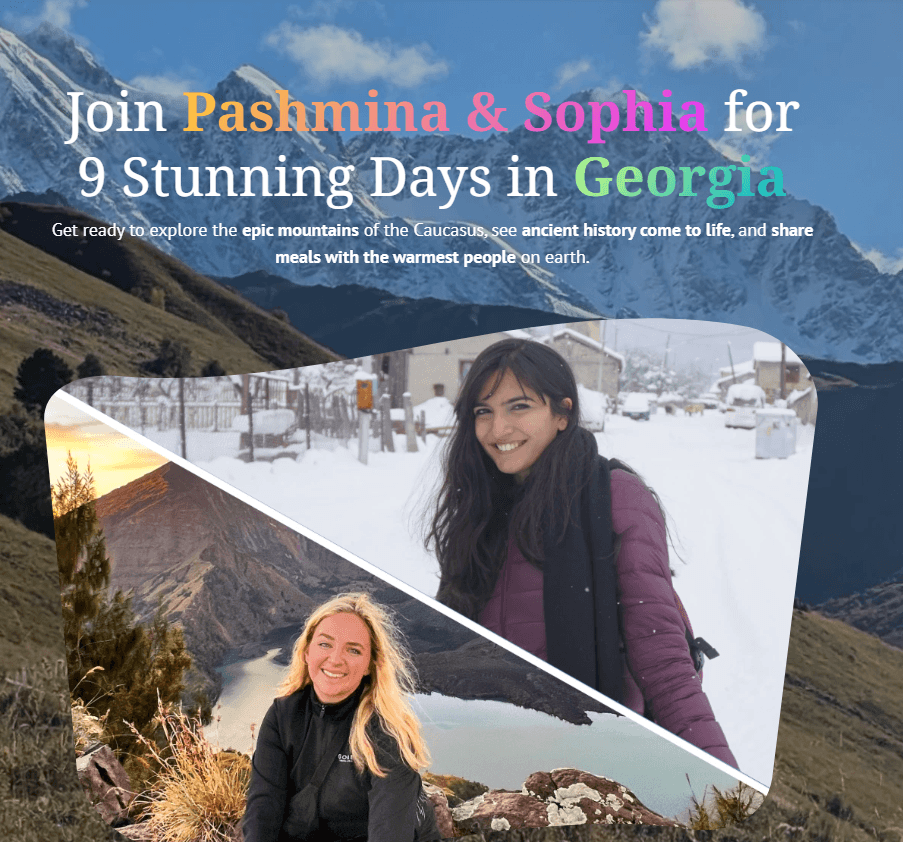
The Annapurna Circuit Trek Itinerary: A Solo Trekker’s Complete Guide
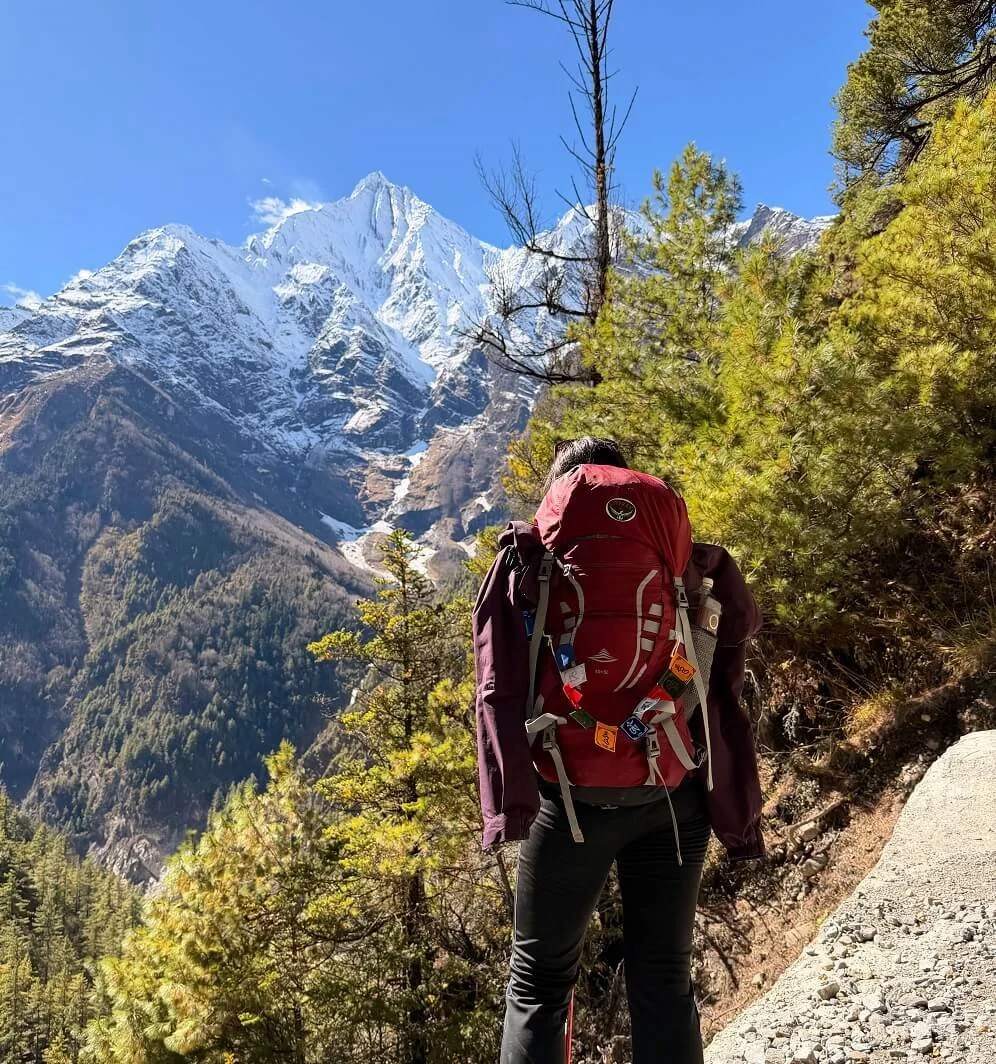
/I spent my time in Autumn hiking the Annapurna Circuit solo on a whim. It took me all of 7 days to decide I needed to be in the mountains. period.
Could you get a guide to hike the whole trail or parts of it?! Yes, you can and I’ll share more in detail.
I just wanted to say that I confident enough with a GPX maps, and a clear road going all the way to Manang that you can hike to this side of the Himalayas alone.
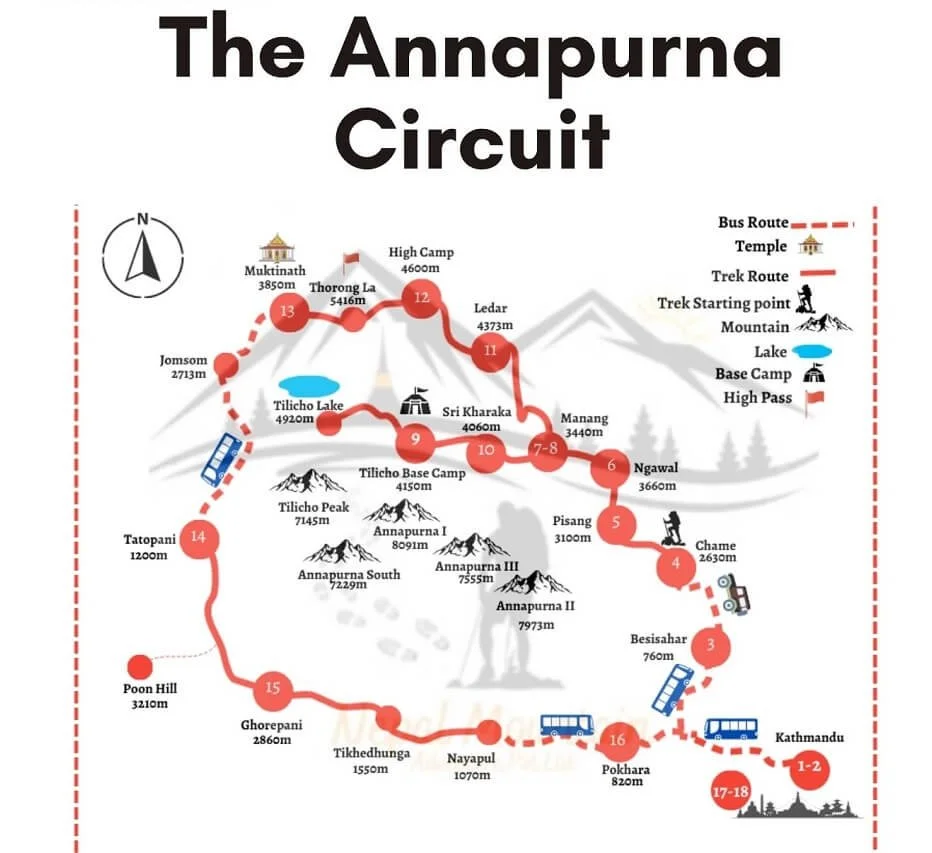
The bummer thing is that there’s now a road to get here and it takes extra effort to find the Natural Annapurna Trails (NATT). The full circuit is 22+ days, but I went until Thorong La Pass at 5,415m, around 300 feet higher than Everest Base Camp.
I did the Annapurna circuit in 12 days and here is my complete itinerary on how you can do this trek.
Get My Digital Guide On How To Do Annapurna Circuit Solo
[Get It Here] This ebook is designed for independent trekkers who want to hike the Annapurna Circuit solo or self-guided, without guesswork or outdated advice.
What You Should Know About The Annapurna Circuit Trek

here’s my itinerary to hiking the annapurna circuit trek solo
Not to be confused with the Annapurna Base Camp trek, the Annapurna Circuit is one of the few trails in the world that brings you face-to-face with 7,000–8,000 m peaks.
It’s iconic not just for the mountains, but for the journey itself — how often do you get to see a high 8000m all to yourself?
The trail loops around the Annapurna Massif, home to Annapurna I (8,091m), one of the deadliest mountains in the world, and a collection of dramatic peaks like Gangapurna, Tilicho, Nilgiri, and Dhaulagiri.
What makes this trek unique is its accessibility: you don’t need technical climbing skills, and the infrastructure (teahouses, trails, villages) makes it possible to walk independently with proper preparation.
At the same time, the altitude, weather and terrain is not to be taken lightly. It is afterall a 258km (160 mile) hike that runs through the Annapurna Himalaya range in northwestern Nepal.
You will also be crossing Thorong-La Pass at 5,416m, one of the highest trekking passes in the world with plenty of side trips like Tilicho Lake at 4,919 m and Ice Lake at 4,020 m.
On average it takes anywhere between 12 to 22 days to complete the entire Annapurna Circuit. The variation depends on your pace, chosen side trips, and how much time you spend acclimatising along the way.
Also read: Things To Do in Pokhara That's More Than Trekking (2026)
Overview On How To Do The Annapurna Circuit
source wikimedia commons
Average budget: 3,000 NPR/day (~USD 20)
Total spend: ~USD 300-400 for 12 days (including $50 for guide/porter last 3 days)
Best place to buy gear: Goreto Gear Traders (Kathmandu)
Best place to rent gear like bags: Up To Date Trekking (Kathmandu)
Online permit: 3,000 NPR (you can get your permit here)
Getting to the trail: KTM → Besisahar (bus) → Besisahar → Dharapani/Jagat (jeep). You can
Is It Safe To Do The Trek Alone?
Safety is such a big question! I thought I address this since I did it solo as a woman and saw plenty other women doing it solo.
This was a very social hike and I found it to be safe. While it may be safe, the weather can change pretty fast very quickly.
If this is your first ever hike, you shouldn’t be going alone but if you have hiked before in other places, then this is honestly a well-traversed and easy hike.
It is the altitude, snow and weather that changes everything.
You’ll be crossing Thorong-La Pass at 5,416 m, walking through rugged terrain, and dealing with rapidly changing weather.
The biggest risks aren’t crime but rather they’re altitude sickness, sudden storms, slippery trails, and exhaustion which can hit the most seasoned hiker.
Don’t Want To Do It Solo?
If you don’t want to do the Annapurna Circuit solo, you could hire a guide for the entire trek.
10 Day Adventurous trek: There are good deals on GetYourGuide so I highly recommend checking it here than official sites. Book it here!
If you also want to hire a guide last minute in Manang for just the last 3 days, you can do that but it is sometimes it is more expensive and it depends on luck and whether you get a good one!
Also read: Nepal Packing List: What To Pack for Trekking in Nepal?
The Annapurna Circuit Trek: My Experience
Day 1: Kathmandu-Besisahar-Dharepani
🚙 Kathmandu to Besisahar: 175km (7 hours) (by bus)
🚙 Besisahar to Dharepani: 35km (3-4 hours by jeep)
Where To Stay: Hotel De Roadside & Cottage
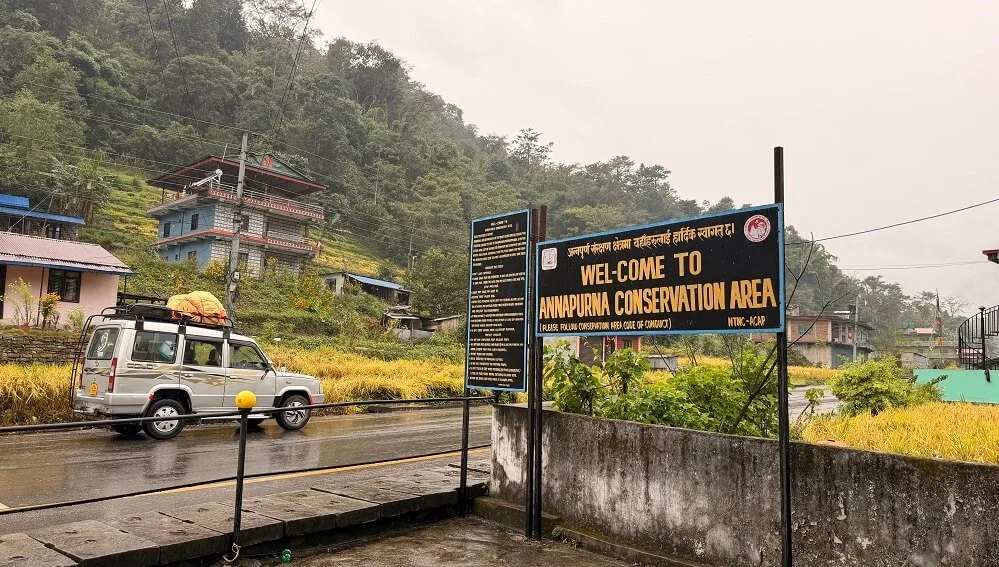
the checkpoint permit where you scan your printed permits
The first day is a logistics one. You begin your journey from Kathmandu or Pokhara to Besisahar. You should catch the earliest bus from Gongabu/New Bus Park and be there by 6.00am.
You could also take a jeep that leaves at 7am-7.30am but it is not as comfortable as I thought it would be and costs 1000 rupees eventhough I ended up taking this.
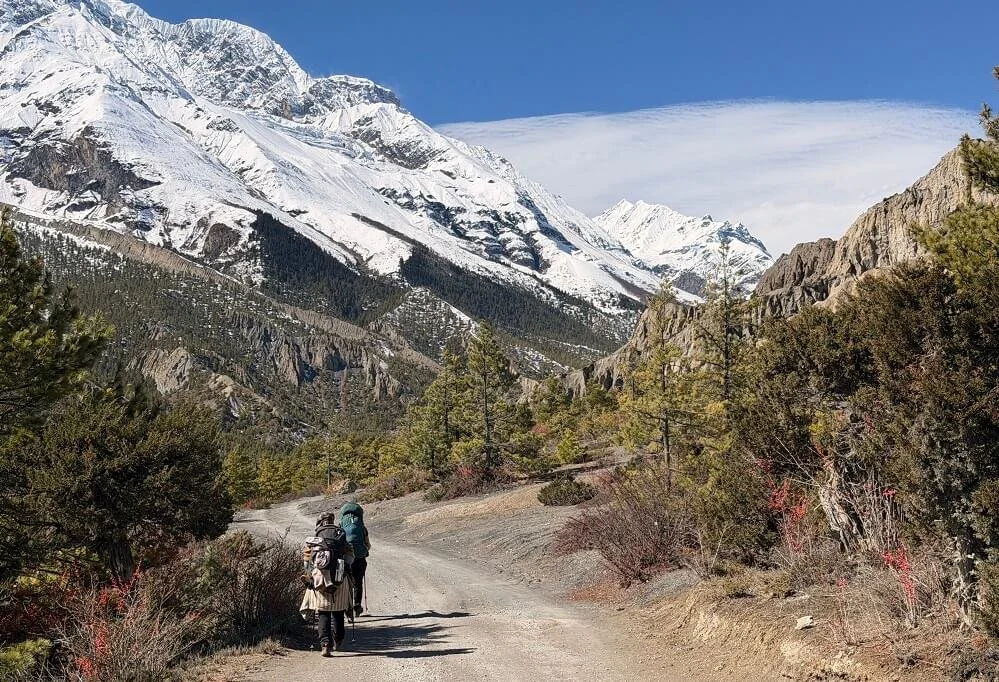
The journey takes 7 hours and by the time you reach Besisahar it takes another 3-4 hours to get to Dharapani. There were dozens of jeeps leaving for Bhulbule, Chame or Dharapani as the starting point. You could decide which is the best starting point for you depending on the time you have.
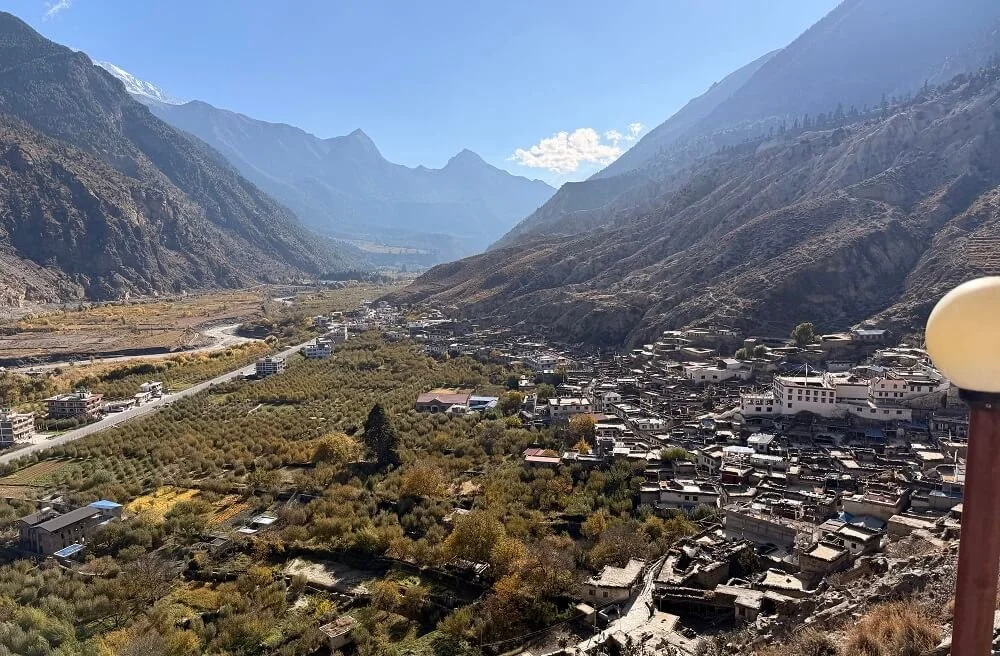
gorgeous views of the valley in dharepani on the annapurna circuit
Besisahar is around 760m and Dharapani is about 1,860m which means you'll gain significant elevation heading from Besisahar to Dharapani. The roads were not in the best condition after a cyclone in very muddy terrain – though you will pass through hillsides, waterfalls and rice terraced feels.
You will see the Marsyandi River flowing through and along the way also come across the Chamche waterfall – a single tall cascade that is worth for a lunch stop view at the Super Rainbow View Guesthouse.
Day 2: Dharapani-Chame
⛰️ Dharapani to Chame: 18km (approx 8 hrs)
⛰️ Elevation gain: 1250 m / Elevation loss: 448 m
Where To Stay: Happy Home Stay
hiking from dharepani to chame - the first official day
You will officially start hiking today, and it’s a long one — a humbling 18km with plenty of natural trails along the way.
Leaving early at 7am means you mostly have the trail and road to yourself.
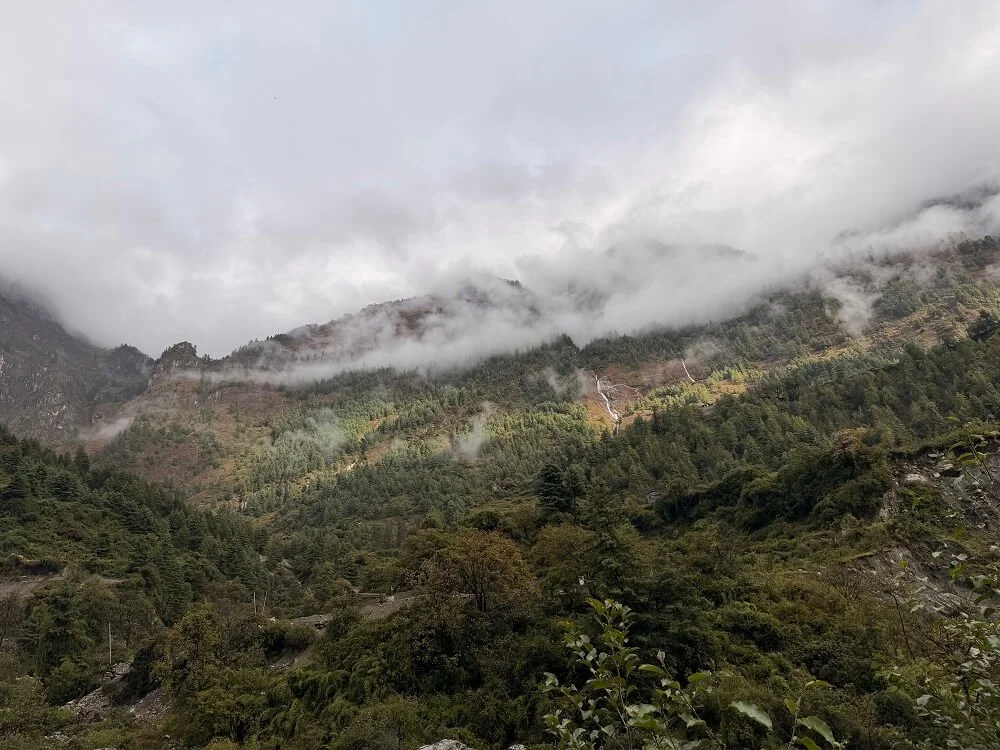
The mountains peek through in the distance, and it feels incredible to start walking with the Marsyangdi River thundering alongside you on the right. The lush greenery and early Autumn colours transport you into a slower rhythm that it is hard not to stop and stare.
You will also come across the Manang hydropower project built by the Chinese and the construction is an eyesore along this stretch. But the path changes soon as you cross the white-red markers that allows you to see mystical forests, and even a gushing waterfall on these stone steps!
The first long suspension bridge crossing begins and it is a sharp uphill stair workout pass granite cliffs. It is a big elevation gain in a short amount of time and it gets intense as you head towards the Timang village.
By noon, you will want to stop at Syarku (2,705m) and have lunch at the Organic Villa and Restaurant. The silence, dense vegetation and snow-clad peaks in the distance stay with you, and from here it’s a long, gorgeous, almost never-ending walk right into Chame village.
Day 3: Chame-Upper Pisang
⛰️ Chame to Upper Pisang: 15km (approx 6 hrs)
⛰️ Elevation gain: 927 m / Elevation loss: 307 m
Where To Stay: Hotel Mountain Bridge & Rooftop Restaurant
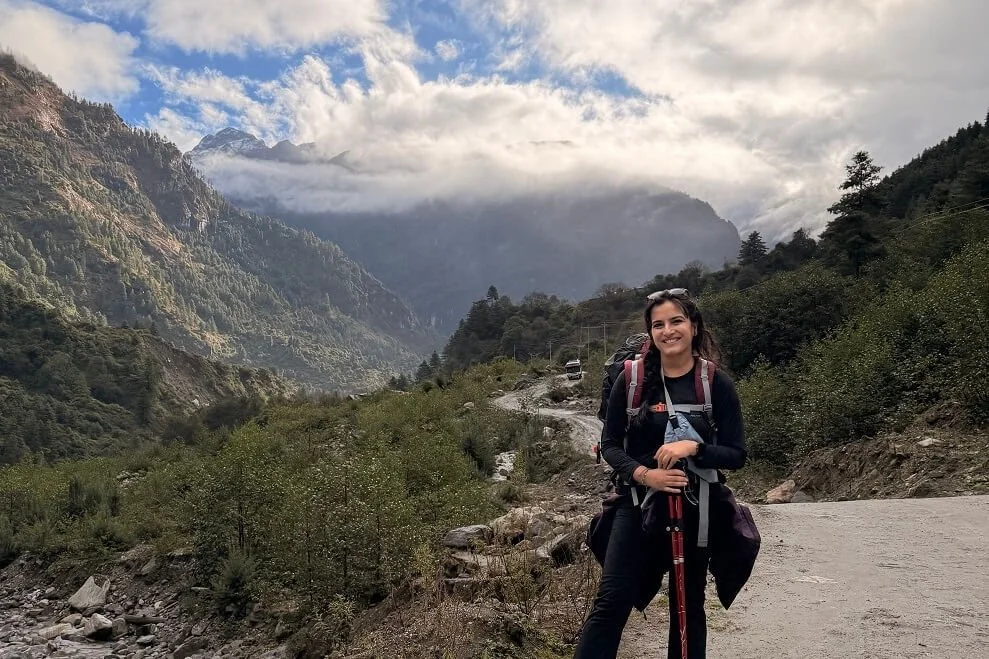
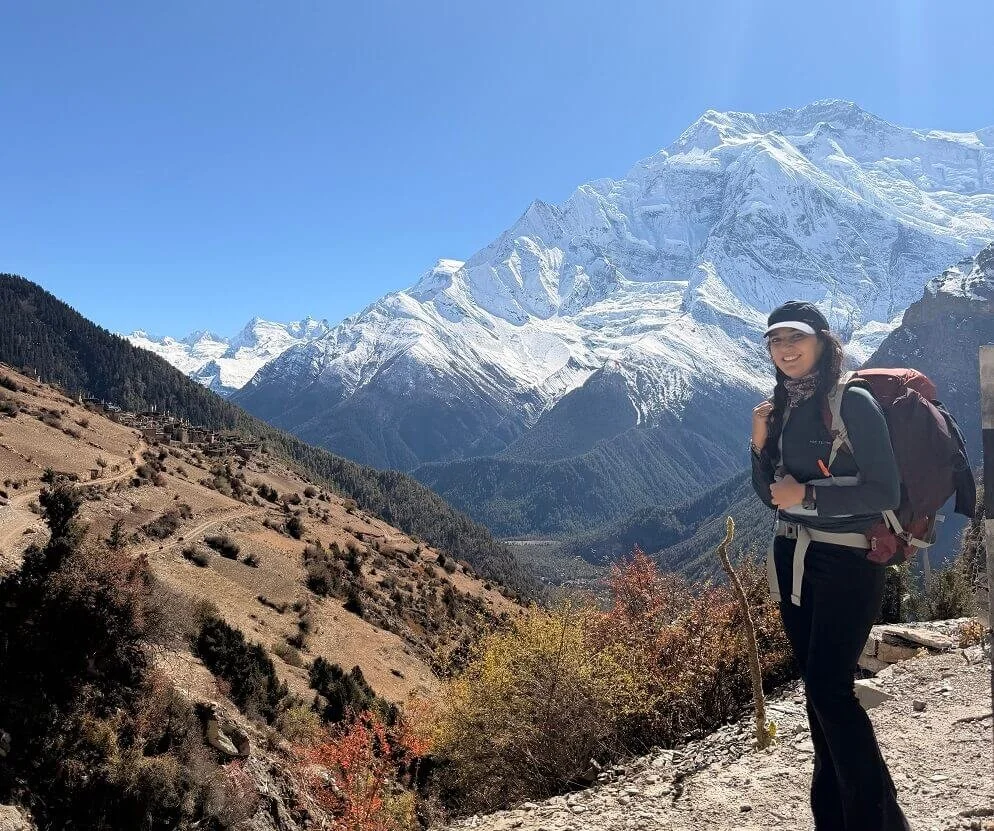
stunning views as I head towards upper pisang
The Chame to Upper Pisang circuit is one of the most scenic on the Annapurna Circuit. Most people take the Lower Pisang route, but by choosing the upper route you have more dramatic views of the Annapurna range!
This is also the day that you will come across a Farmhouse complex surrounded by apple fields with the most amazing bakery. The cherry on the top are the stunning views – I was awed to see Annapurna II and the jagged Nilgiri range.
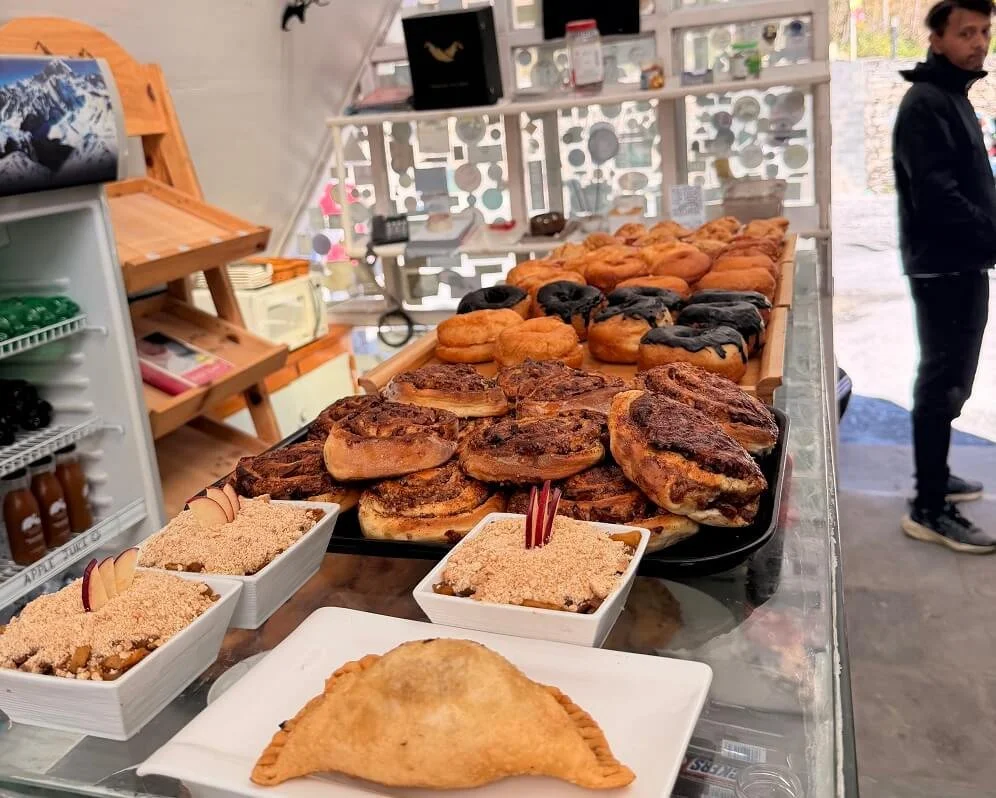
omg look at these goodies! one of the best apple walnut muffins that i had
specks of autumn - i couldn’t believe these were my views!
It starts off with a road passing through the villages with some sections being quite challenging and the only way to get some shade and walk among these pine trees were to take the white and red marked trails.
Sometimes that adds a bit more distance but it is also a welcome respite because I took a long time to sit and stare at these mountains. You will pass Dhikur Pokhari village which is the most beautiful and breathtaking part of the route.
After crossing the river, you will arrive at a fork and make sure to choose the Upper Pisang route. Upper Pisang is at 3300m and it is quite a climb to even arrive at the guesthouse (Hotel Mountain Bridge & Rooftop) which is worth the stay!
Day 4: Upper Pisang-Ngawal
⛰️ Upper Pisang to Ngawal: 10.9km (approx 6 hrs)
⛰️ Elevation gain: 715 m / Elevation loss: 357 m
Where To Stay: Kangla Cottage
heading from upper pisang to ngawal and shocked by these views
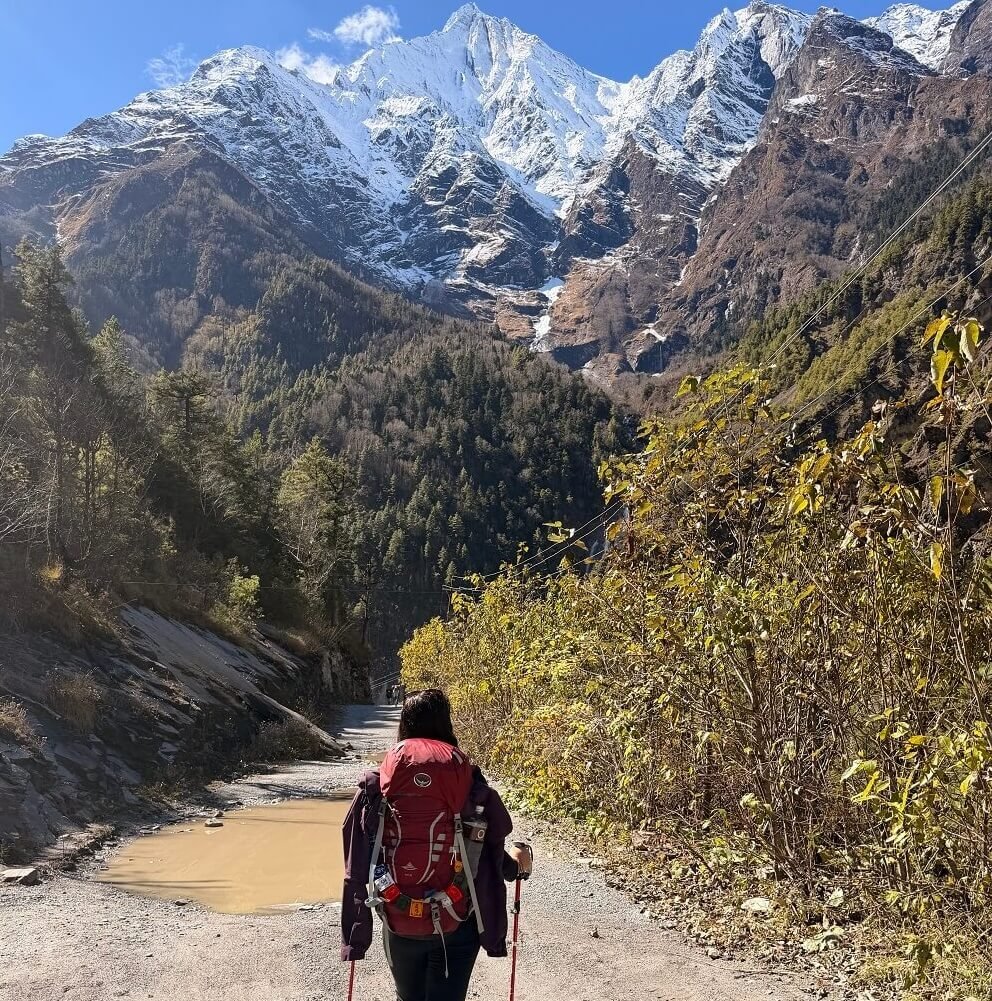
The most glorious days with views that may just make you wonder how is this real? But a fair warning here: the climb is brutal as you have atleast 10km of hiking over an elevation gain of 370m.
Just as you start your day, you’re already hit with views of Annapurna II, III and IV. It is a fairly straightforward hike and 30 minutes later take a short detour towards Green Lake for a short break. The terrain slowly fades into arid slopes, rocky paths and that’s when the steep uphill climb towards Ghyaru begins.
Ghyaru sits at 3,730 meters with jaw-dropping views of the Annapurna range. But you aren’t stopping there, but in Ngawal, which means a super-steep climb that will take you at least 90 minutes. Ghyaru itself is magical as you reach it, with 360-degree views of Annapurna massif and wind-shaped landscapes.
a view of ngawal
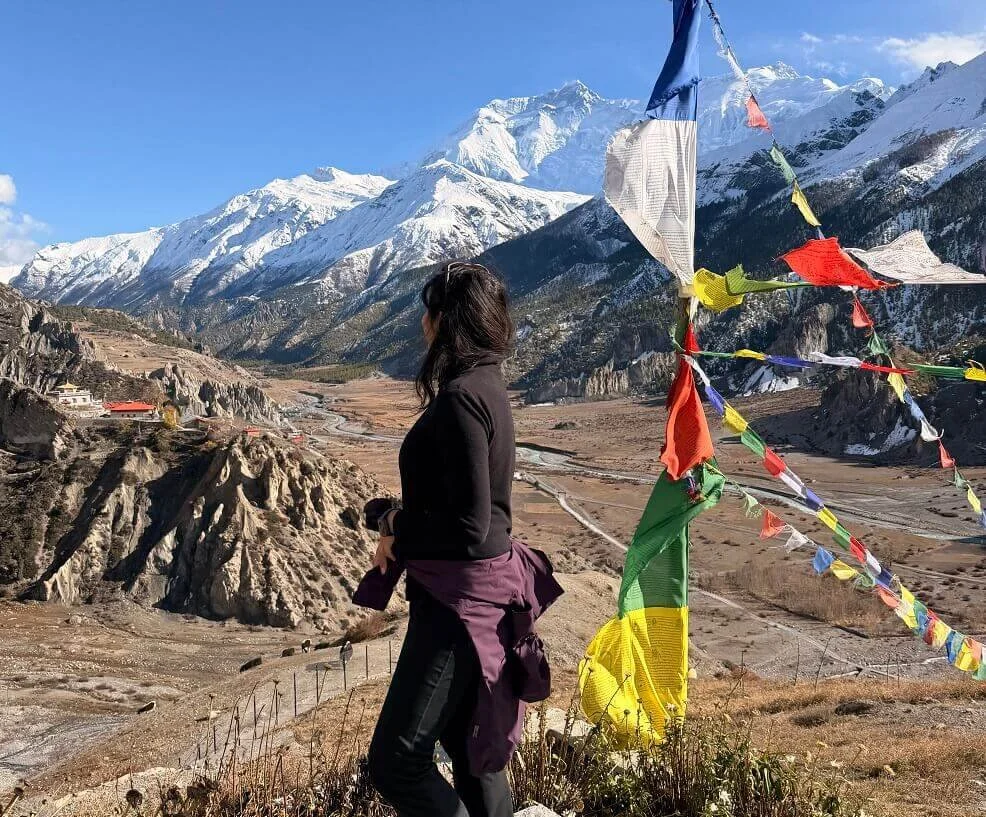
Stopping here for a chai is a must after that steep climb. Over the next 5km, the trail winds across high slopes, past wheat fields and mani stones — small worship stops carved into the mountains. Prayer flags line the ridges, the terrain turns barren, and before you know it, you’ve arrived in Ngawal (3,657m).
Day 5: Ngawal-Munji/Brakha
⛰️ Ngawal to Brakha: 3-8km (approx 3 hrs)
⛰️ Elevation gain: 715 m / Elevation loss: 357 m
Where To Stay: Solukhumbu Lodge & Restaurant
very chill hike towards brakha where you can take your time
Today’s hike is a very chill hike and it can be as long or as short as you want. If you go through the high scenic Chulu route, you get the whole pass to yourself but an additional 5km.
But if you don’t fancy a long climb, you can reach Munji or Brakha within 2 hours from Ngawal and that means a total of 3km hike. Starting the trek at 9am is not an issue for this day as there is less climbing here, making it a good day to settle into the altitude and enjoy the scenery.
You’ll pass grazing yaks and hardy crops adapted to the dry and sometimes parched terrain.
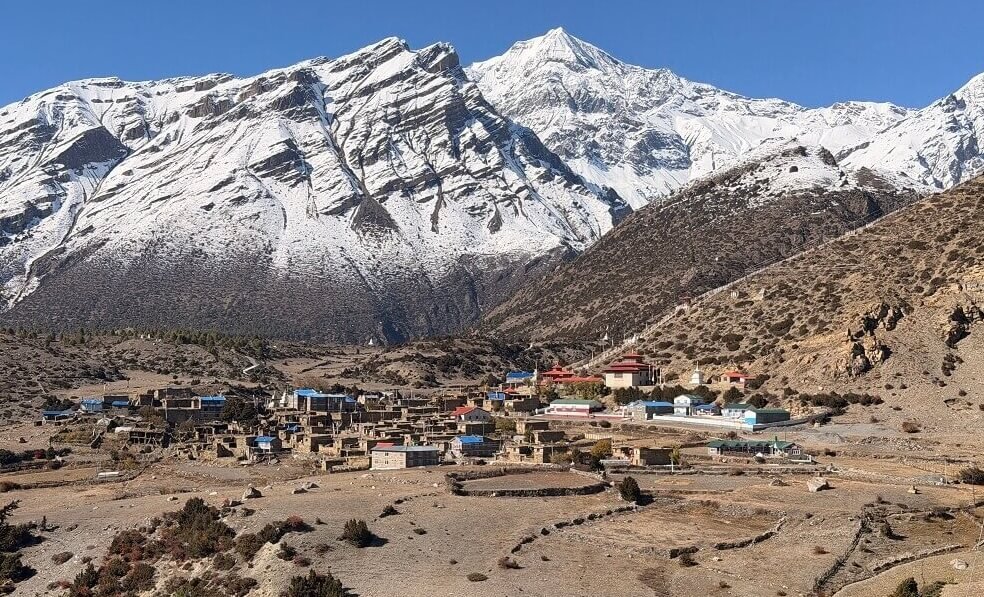
Gangapurna Peak (7,455m) & Annapurna III (7,555m) - you will see this on your way
The spectacular thing is that now you can see Gangapurna Peak (7,455m) & Annapurna III (7,555m) – these peaks start to dominate the skyline as you approach Braka and Manang.
The trail is clear and took us along the route to Ice Lake, which should be planned to visit the next day. You will pass a sign stating how there is Snow Leopards (the ghost of the mountains) which are a mainstay in this region.
You could choose to stay in Munji or Bhraka if you wish to go to Ice Lake. It is also possible to arrange for a guide here or in Manang to follow you for the last three days up to Thorong La pass.
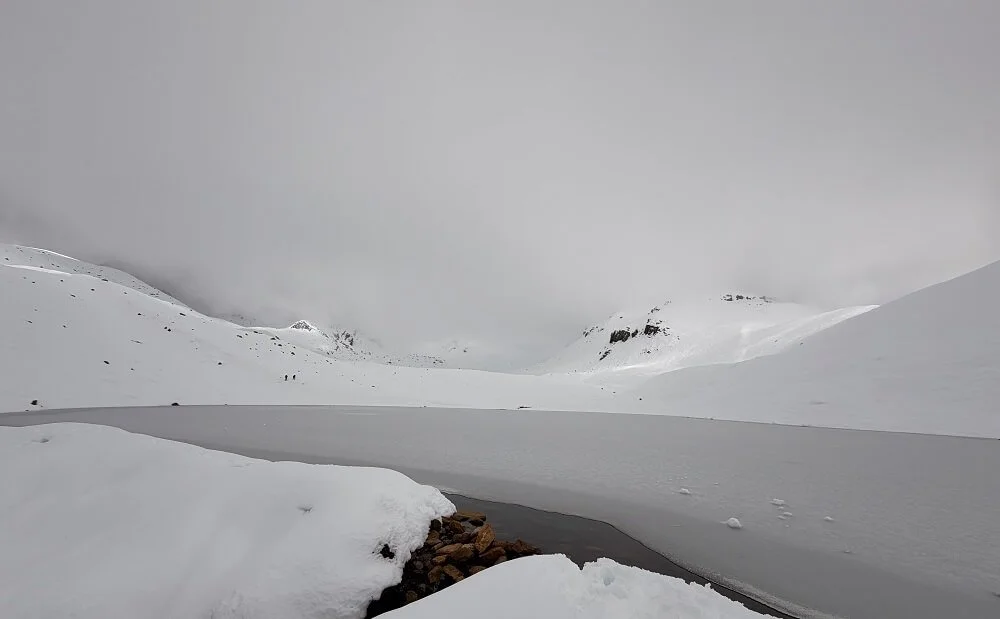
Day 6: Ice Lake
⛰️ Ice Lake: 13.5km (approx 8 hrs)
⛰️ Elevation gain: 1100m / Elevation loss: 1100 m
Where To Stay: Solukhumbu Lodge & Restaurant

snowy ice fields towards ice lake - omg i could barely see the route
With most trekkers spending an extra day in Manang, the best way in my opinion is to head straight up to Ice Lake (Kicho Tal) as it offers one of the most breathtaking vantage points on the Annapurna Circuit at 4,620m.
This isn’t a rest-day hike — it’s an intense push. With over 1,100 m of elevation gain, it’s not to be taken lightly, but this acclimatisation trek is essential if you plan to sleep at High Pass before tackling Thorong La or simply if you want to challenge yourself.
You won’t be dissapointed by the views. We started at 7am, passed a stupa, and even spotted blue sheep which aren’t actually blue, except for their tongues. The halfway views were already beautiful.
You could see Annapurna 3 and Tilicho Peak clearly, and it felt like the mountains kept getting bigger the higher we went.
i couldn’t believe my eyes but i was so scared crossing these passes heading to ice lake
because of bad weather this was my view, but on a clear day it is glorious
Soon, the fields turned icy, and that’s when it really hit me: this was getting tough.
We aimed for the tea house to regroup. Early November, combined with a cyclone, had left a lot of snow on the trail, and by the time we reached Ice Lake, it was nearly frozen and the view wasn’t perfect.
But the journey itself was a 10/10. Surrounded by towering giants, it felt less like we were looking at mountains and more like we were walking among them.
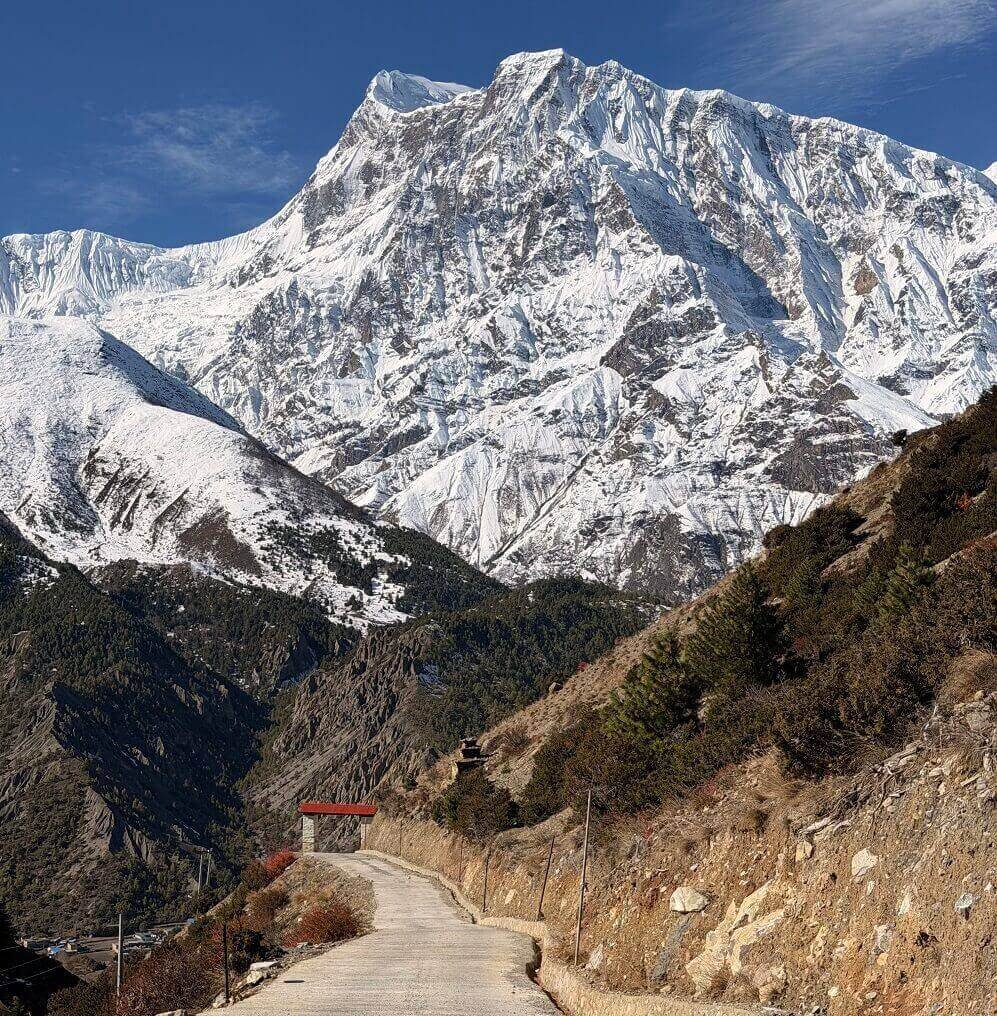
Day 7: Braka-Manang
⛰️ Braka-Manang: 5km (approx 2 hrs)
⛰️ Elevation gain: 240m / Elevation loss: 360 m
Where To Stay: Himalaya Cottage & Cafe Bar
at the top of the manang viewpoint
This is hardly a trek and more of a walk right up to Manang village to have a rest day and small hikes around Manang. It is mostly a road with some construction on the side but the walk is still nice after some hard days.
Once in Manang, it’s the perfect place to rest and acclimatise. You can explore the village’s monasteries, mani walls, and local teahouses, or take short side hikes to nearby points like Gangapurna Lake or the viewpoints above the village which is what I did.
Another view point is Chongkor Tea House and if you are adventurous, you should also visiti Milarepa cave but it takes 3.5 hours one way to reach the cave and should only be attempted if you have enough energy in your reserves. Word has it that the cave is believed to have been the residence of the great 11th-century Tibetan yogi and poet Milarepa during his meditations. You can follow the route from here.
The best thing about Manang is the luxurious comforts from buying everything you need, amazing bakeries and even fancy dome like heated hotels that you don’t feel like leaving away from!
Day 8: Manang-Leddar
⛰️ Manang-Leddar: 10km (approx 6 hrs)
⛰️ Elevation gain: 840m / Elevation loss: 140 m
Where To Stay: Hotel Snowland Hotel & Restaurant
Leaving Manang, the trail feels noticeably quieter. The wide valley begins to narrow, greenery fades, and there is just a lot more snow but you definitely feel the altitude. It is not a hard hike but the altitude makes it so!
There’s no rush here though, and plenty of pauses to catch your breath, take in the views, and let your body adjust. You will notice a lot more yaks grazing in open pastures and mules transporting wood to keep the guesthouses warmer as we go higher.
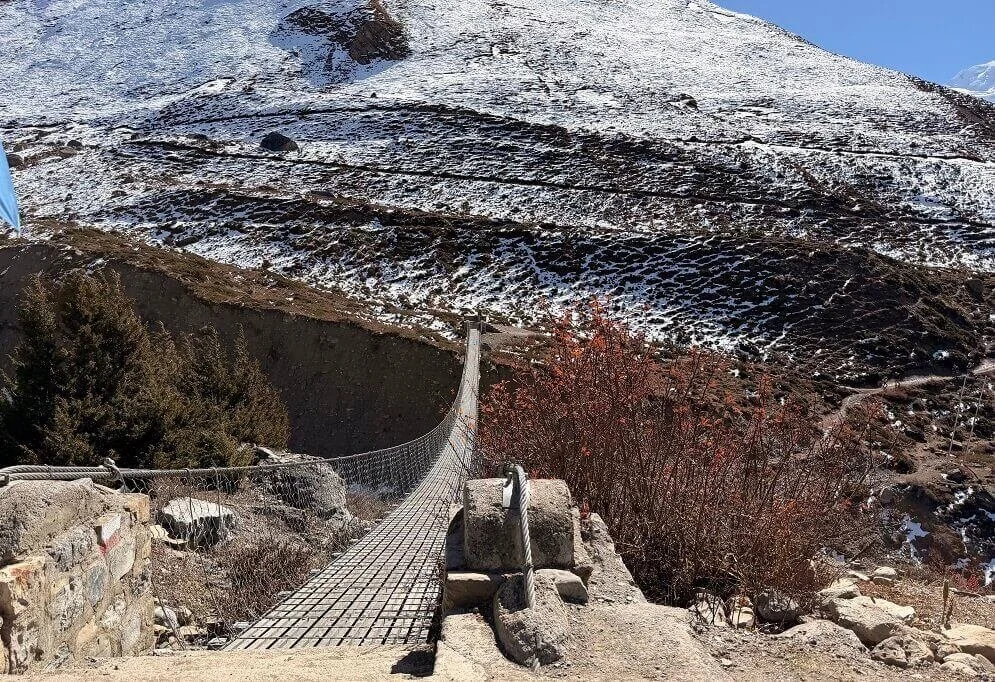
the suspension bridges you will see throughout the hike
If you have not hiked up to Tilicho Base Camp, you will still catch glimpses of Tilicho Peak and the Annapurna Range consisting mostly of Gangapurna and Chulu Peaks!
By the time you reach Leddar, it’s hard to ignore how cold it gets — evening temperatures are already well into the sub-zero range. The rooms aren’t the cleanest, but they’re functional, and the village itself is much quieter since most trekkers stop at Yak Kharka instead.
I’d still encourage staying in Leddar, as it helps you cover more ground and keeps the next day’s hike to High Camp at a more manageable and well-paced rhythm.
Day 9: Leddar-High Camp
⛰️ Leddar-High Camp: 10km (approx 6 hrs)
⛰️ Elevation gain: 675m / Elevation loss: 30m
Where To Stay: Thorong High Camp
can you spot a face?
heading towards high camp - more snowy fields
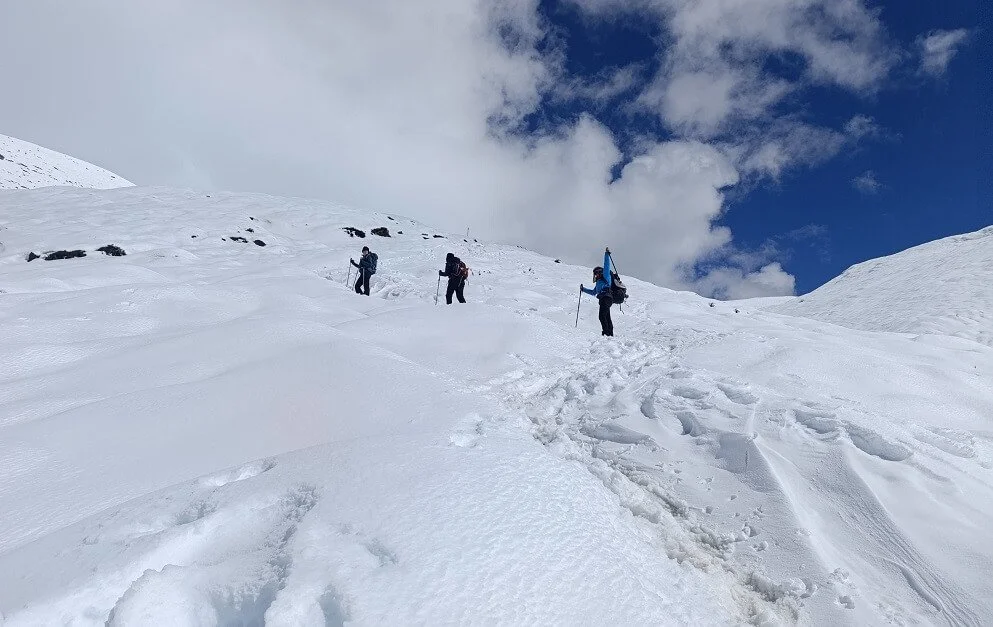
This is not a day to be taken lightly – It’s a relatively short day in terms of distance but the elevation gain of 675 m makes it physically demanding. The push towards High Camp is when it becomes hard!
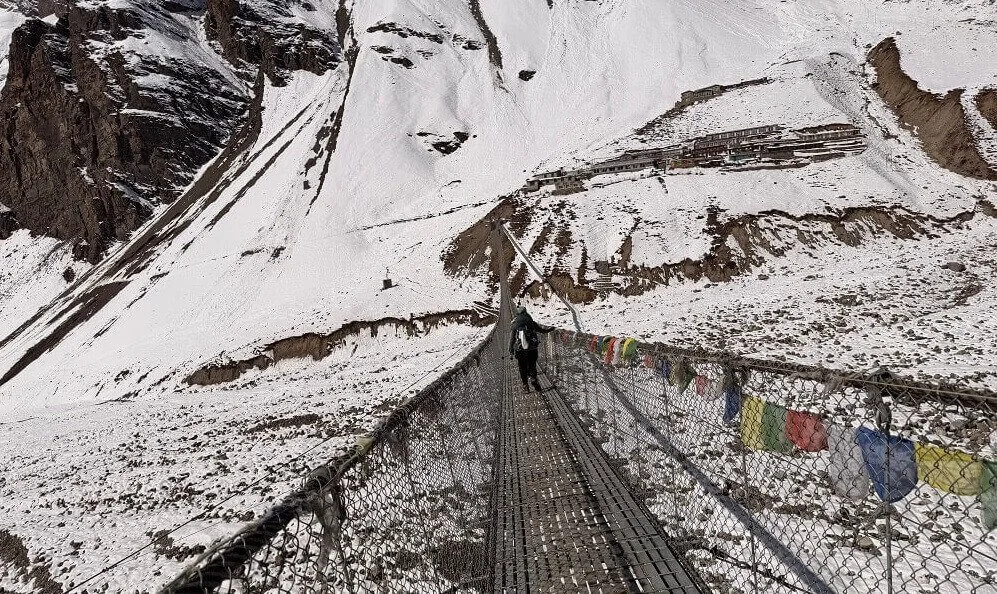
We moved through quiet valleys, climbed steadily, and eventually reached Thorong Phedi — the “foot of the mountains.” There was a lot of snow, and we crossed a long suspension bridge that, if you looked closely, kind of looked like a face on the mountain, maybe it was Lord Shiva?
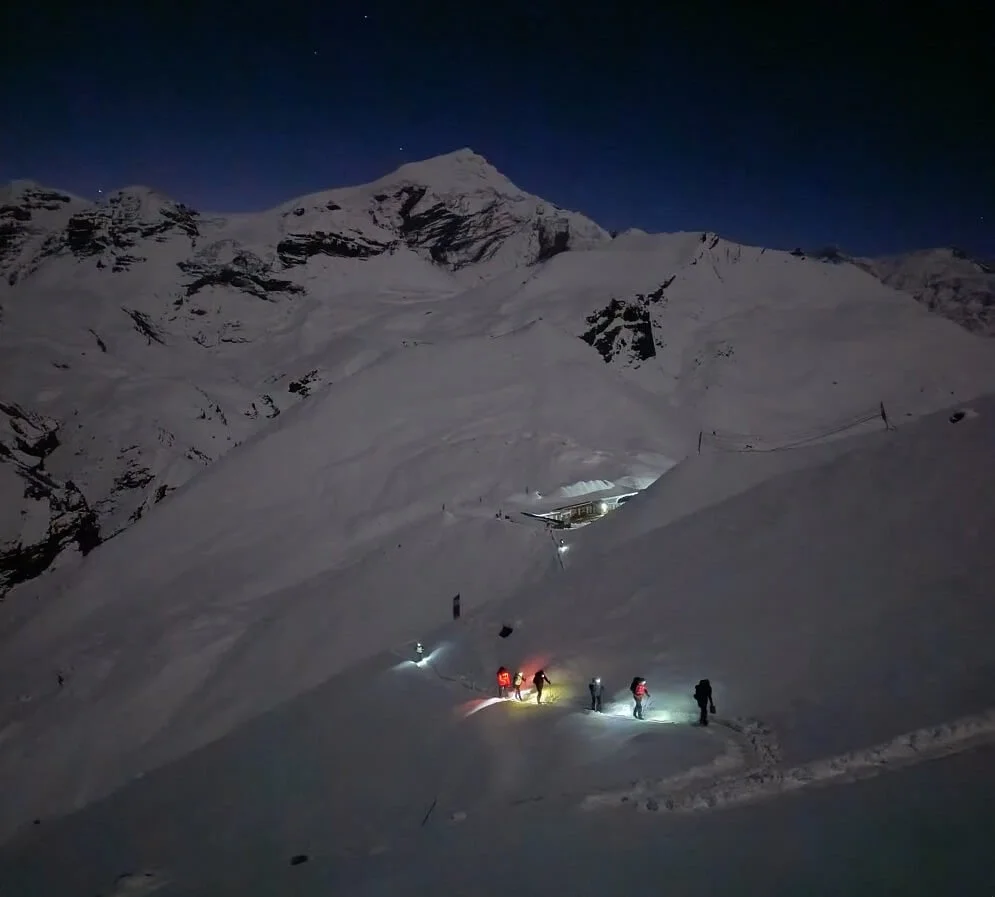
Tempting as it is to stop at Thorong Phedi, you still have the steep climb up to High Camp at 4,880 m. We started around 1 pm, and if you’re comfortable sleeping at high altitude, tackling this section in the afternoon is much easier than starting at 4 am — the morning cold and fatigue make it feel far tougher.
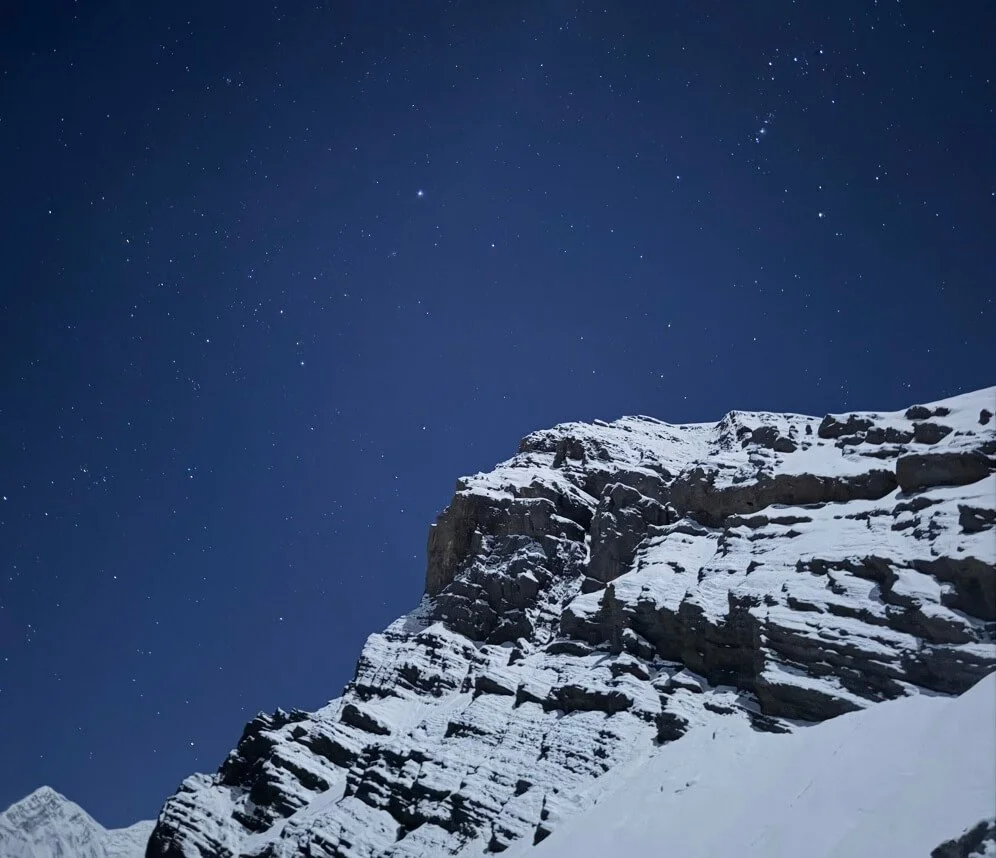
the night sky at high camp is insane
Once you reach High Camp, the size of the teahouse is immediately noticeable compared to the smaller stops you’ve stayed at so far.
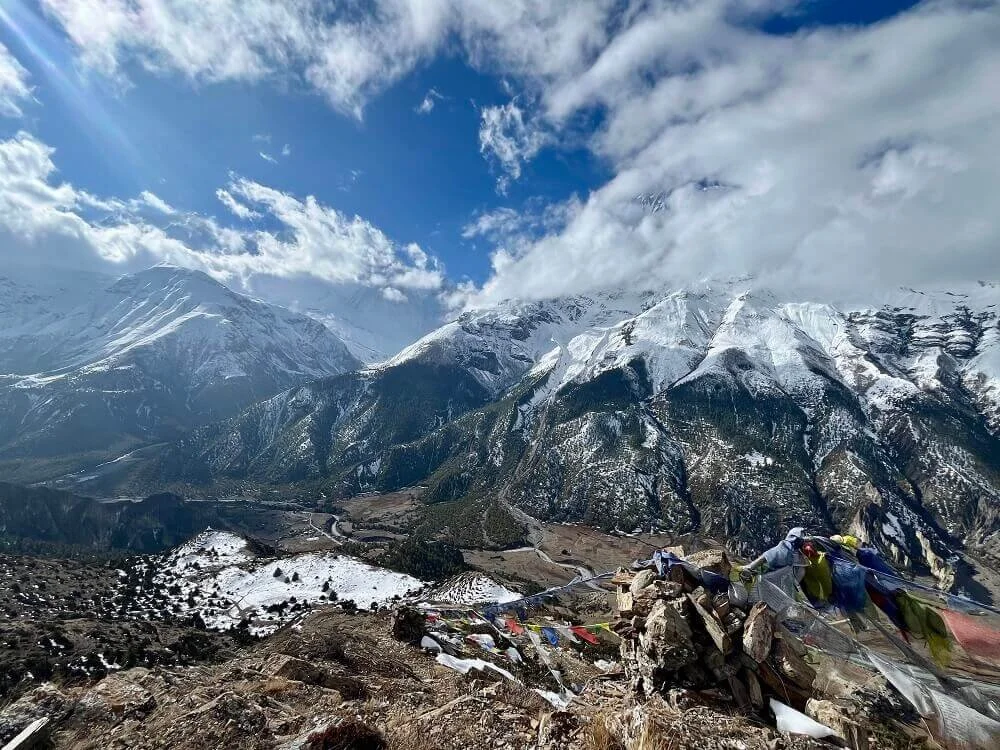
Don’t miss the short viewpoint hike — a 20-minute climb along a frozen trail that rewards you with stunning panoramic views of the Annapurna range. It’s a perfect way to soak in the high-altitude scenery and feel the scale of the mountains before your Thorong La crossing.
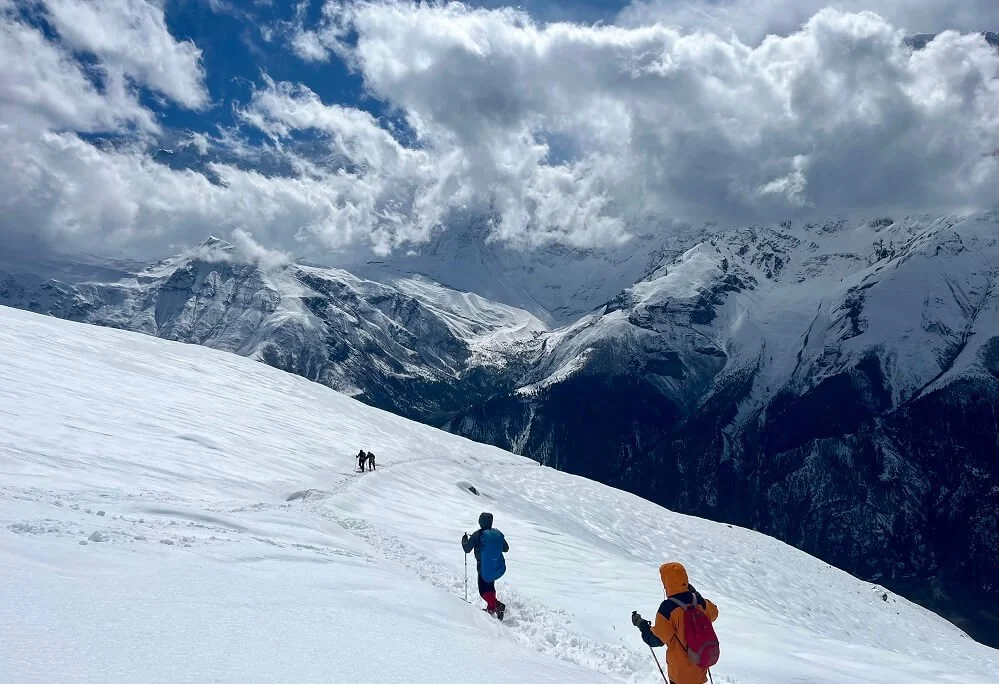
Day 10: High Camp-Thorong La Pass-Muktinath
⛰️ High Camp-Muktinath: 15km (approx 9 hrs)
⛰️ Elevation gain: 540m / Elevation loss: 1,620m
Where To Stay: Hotel Face Resort
morning 4.30am call time as we were heading towards thorong la pass
The day starts early at High Camp, where the cold is biting and the thin air makes every step feel heavier.
You wake up at 4am to climb through frozen pastures and rocky ridges, with the mountains rising on all sides.
It is the most difficult hike from all the days because of the freezing temperatures & altitude. You might suffer headaches and nausea and it is important to eat and drink as much as you can. I half thought of giving up but it was closer to get to Thorong La pass and descend than going back.
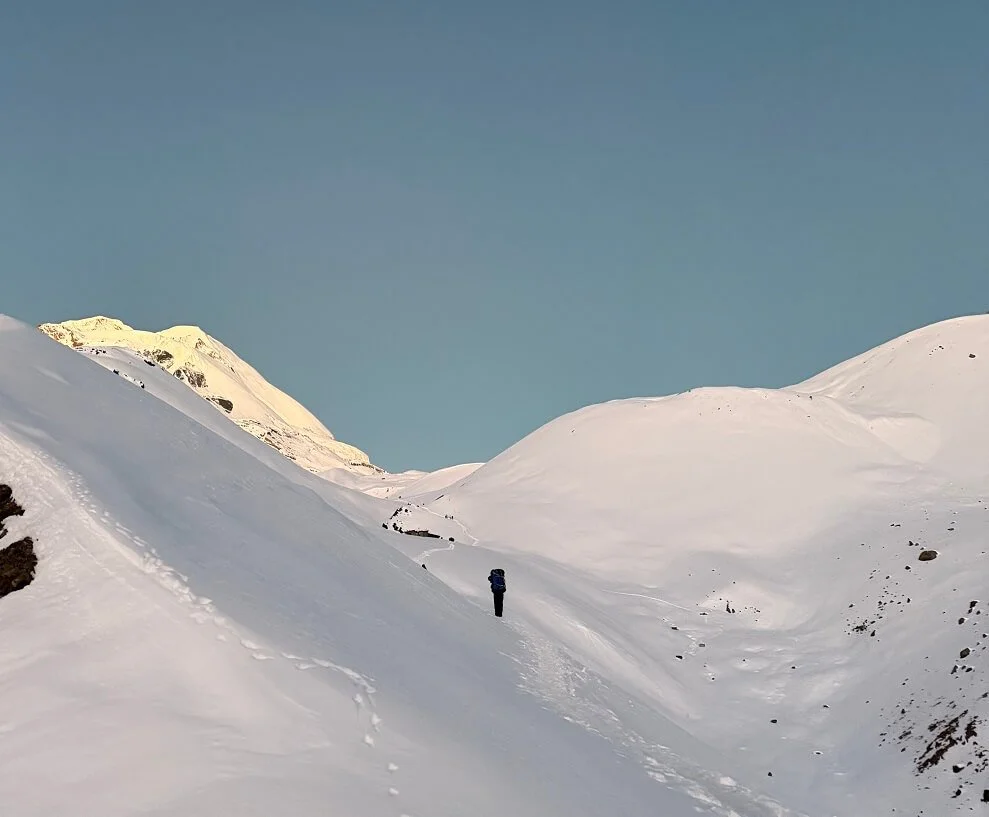
i find this time of the day magical - the predawn hours
Reaching Thorong La Pass (5,416 m) is an unforgettable moment — the highest point of the trek. Stopping here at the teahouse helped a lot and you should have their honey ginger tea. The view from the pass is otherworldly, you see jagged peaks, snowfields, and the Upper Mustang region not far from where you are.
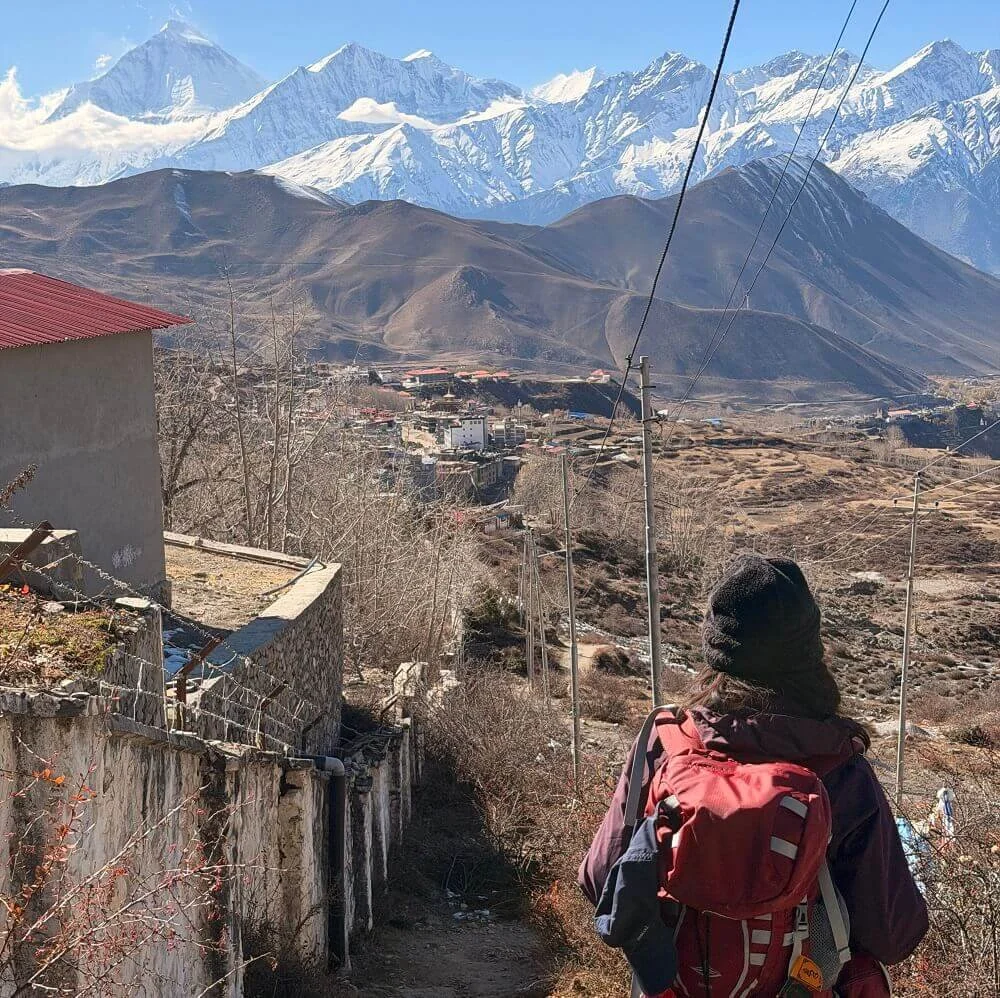
The descent to Muktinath (3,760 m) is long and steady, shifting from barren high-altitude landscapes to more arid and desert like terrain. If you look closely you might even spot Dhaulagiri (8,167m) as you reach Muktinath which is insane!
Day 11: Muktinath-Jomsom
⛰️ Muktinath-Jomsom: 22km (approx 6 hrs)
⛰️ Nearby treks: Dhumba Lake
Where To Stay: Hotel Face Resort
view of dhaulagiri from the far left in muktinath
After the long climb over Thorong La, Muktinath is the perfect place to rest and recover and stay at the Bob Marley Hotel or the Face Resort for heated mattresses.
For those who want to stretch their legs without committing to another high-altitude trek, a day trip to Marpha Valley is a great option from Muktinath. It is touristy but it is nice to spend a day with its quaint streets, monasteries, and the local apple brandy production.
If you’re feeling ambitious, the classic continuation of the trek would be Muktinath → Jhong → Kagbeni → Jomsom, which takes you through high-altitude villages and arid landscapes.
However, the trail can get tricky — winds tend to pick up dramatically after 10 am, and after a tough climb over Thorong La, I decided it was wiser to enjoy day trips around Muktinath instead of pushing for the next village.
By taking this approach, you can still experience the beauty of Lower Mustang without overexerting yourself. There are also short treks towards Dhumba Lake in Jomsom if you would like to walk somewhere.
Day 12: Jomsom-Pokhara
⛰️ Jomsom to Pokhara 158km (approx 6 hrs)
⛰️ Optional Trek route: Marpha – Tatopani – Ghorepani – Poonhill – Pokhara
Where To Stay: Xanadu Homes
The last stretch from Jomsom to Pokhara is mostly about relaxing and taking it easy. You can fly or take the jeep.
If you’re not quite ready to stop moving, a short detour to Tatopani is worth it — the hot springs are perfect for sore muscles and a little unwinding before returning to Pokhara.
I decided to take a 11am long bus ride (too exhausting frankly speaking) from Jomsom to Pokhara simply because I wanted to have a slow morning in Xanadu Hotel.
But many trekkers who continued and wanted to do Poon Hill followed this route: Marpha – Tatopani – Ghorepani – Poonhill – Pokhara – Kathmandu
They took a jeep from Tatopani to Ghorepani and the best way for a lot of people is to see all the peaks and Poonhill (albeit touristy) is a nice way to end the trek.
Back in Pokhara, there’s also multiple day trips and mini hikes up to Pumkot Shiva Temple or checking out the view point called Sarangkot featuring views of the Machapuchare (Fishtail).
What Else Should You Know?/ FAQs
1. When is the best time to trek the Annapurna Circuit?
The best time is pre-monsoon (April to May) and post-monsoon (late September to November and even December). Spring offers blooming rhododendrons, clear skies, and warmer temperatures, while autumn gives crisp weather, stable trails, and spectacular mountain views.
Avoid the monsoon (June–August) due to heavy rain, slippery trails, and landslides, and winter (December–February) can be extremely cold with snow blocking higher passes but up till December 15 it is still possible to do the hike.
2. How many days does the Annapurna Circuit take?
The whole circuit takes 22 days depending on pace, acclimatisation, and side trips. But you can skip some sections from the beginning or the end and choose the best one for yourself.
I skipped the earlier bits because of landslides and rough weather and the last bits because I didn’t want to trek in dusty desert-like terrain. It is up to you but don’t rush it and go to Manang via a jeep as that’s a bad way to get AMS.
3. Do I need a guide?
You don’t need a guide for the Annapurna circuit, as the trail is well-marked. However, guides are useful if you want local insights, help with logistics, or support in high-altitude sections.
For more insights and an offline digital ebook, you can purchase my solo hiking guide to the Annapurna circuit.
A guide can also help if you’re hiking unguided and want insurance coverage from start to finish. You should also get a guide (book here) if you’re not confident reading a map and it is your first time hiking in high-altitude region.
4. What permits do I need?
You only need one permit which is the ACAP (Annapurna Conservation Area Permit) and that can be done online. Make sure you print it out after.
6. What fitness level do I need?
You should be in moderate to good fitness, able to walk 4–6 hours daily on uphill and downhill trails. Long days at high altitude are physically demanding, so prior trekking experience or cardio training helps.
6. How much road vs trails are there on the Annapurna Circuit?
The truth is that the Annapurna Circuit has a relatively large amount of road, especially in recent years as new roads have been built along the Kali Gandaki valley.
Many sections that were once traditional trekking trails are now unpaved jeep roads, and you’ll often share them with local traffic. The path from Upper Pisang onwards has less roads and more trails but the beginning part you can avoid it by choosing the Natural Annapurna Trekking Trails (NATT).
7. What about water?
A good Nalgene BPA-free water bottle is a must-have. You can fill it with hot water at teahouses to hug it and sleep it to keep warm at night and also drink during the day once it cools down a bit. Refilling water at guesthouses usually costs around 100 NPR.
I also brought Aquatabs for emergencies and saw some trekkers using portable water filters, but for me, drinking boiled water was the easiest and safest option throughout the trek.
It’s simple, reliable, and you don’t have to worry about filtration equipment or taste.
Also read: Where To Trek In Nepal? 15 Best Treks in Nepal From Beginners To Hard